Still working to recover. Please don't edit quite yet.
how to switch from Microsoft Office to OpenOffice.org
How to set up OpenOffice.org to work how you want it with templates and clip art, configurations, shortcuts, and more.
Contents
It’s Time to Switch[edit]
You’ve been thinking about it for a while. You’ve seen the PDF converter and sighed longingly; you’ve blushed before the sceptical glances of your open-source and anti-Microsoft friends who say “You’re still using Microsoft Office?†you’re looking at your budget and wondering why you would pay to get Microsoft Office 2007. And you’ve received Word 2007 files and haven’t been able to open them, so you know there’s going to be some file format issues no matter what you do.
But you haven’t switched over to OpenOffice.org. Quite yet.
Think of this as a virtual guide, the written version of me coming over to your house on a Sunday afternoon to help get to know OpenOffice.org and figure out all the things you’re not quite sure about. Sit down with this article this weekend and in a few hours you’ll feel refreshed, open sourced, and able to hold your head high when you run into those roving gangs of open source supporters.
Why Switch?[edit]
You have your own reasons: price, or principles, or you’re setting up a nice cheap Linux laptop for your daughter to use at school. Here are a couple things I like to talk about.
- Spend your money on something important
I realize that since I’m targeting this article at individuals, that the upgrade or full price of Microsoft Office might not make or break you. But if it’s you and your family; your small business; your volunteer organization that feeds homeless families…now you even more seriously need to look at the right way to spend your money. Microsoft Office is a habit, and many people don’t even think about whether they need it. Here’s your opportunity to rank it in comparison to other things you could spend $100 or $500 on, multiplied by the number of licenses.
- You can do it. Don’t fear the interface.
When you’ve been using Microsoft Office since the mid 90s, it’s easy to think that learning another product will be too annoyingly difficult. Trust me. You can learn this. You have to learn new products all the time, whether it’s the new bug entry system at a new job, or starting a job at Sun where all of a sudden you’re using Solaris instead of Microsoft Windows, it’s going to have to happen. There are differences, sure, but don’t let that mental speed bump of fear let you think for a second you’re not going to be able to figure it out.
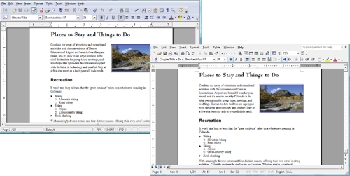
Here’s a demo. Take a look at the same document in Writer, and in Word. I’m purposefully not going to identify them.
- Word and Writer
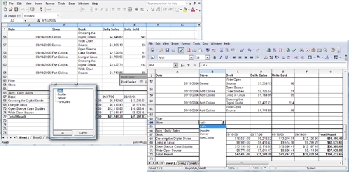
Here’s the same spreadsheet in Excel, and in Calc:
- Calc and Excel
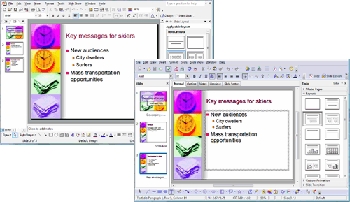
And here’s the same presentation, in Impress and in PowerPoint:
- Impress and PowerPoint
What This Article Is About[edit]
What can I write in a finite article about how to use OpenOffice.org? I can’t cover everything you’ll need to know about how to use the program. But what I can do, in a lot less space, is give you what you need to make getting to know OpenOffice.org easier. I can give you settings to apply that will keep you from having problems in the first place. Not all of them, of course, but with a limited amount of information on how to set up the program, I can help you have a smoother, more enjoyable experience with the program. So that’s what this is: setting up OpenOffice.org to make it work for you.
Switching to OpenOffice.org: Step 1[edit]
The first step, of course, is to get the software. Here are some options:
- Download it from OpenOffice.org
- You can download Novell’s version of OpenOffice.org. Novell is working on macro conversion code, so that’s one reason to try it.
- Get a CD from one of the providers listed here
- Or if you’re going to be getting a GNU/Linux computer, it’s going to be installed already.
Then install OpenOffice.org. Just double-click the downloaded file, or follow the instructions for installing it for your operating system here.
Setup and Configuration[edit]
With several million people using the software, it’s going to be difficult to produce a product that’s set up just the way you want it. There’s more to do than with Microsoft Office, since some of the things you’re paying for are all the licenses that Microsoft bought and all the development work they paid for to get and create templates, clip art, etc. However, it’s not only cheaper but it can be satisfying to set up a program exactly the way you want it. Plus, regarding the little default behaviors you can control, I find OpenOffice.org very easy to control. There are two windows where you go to set up default configuration, and there are a lot of nice choices.
Here are some setup tips to help you get OpenOffice.org humming.
Automatic Settings[edit]
Some of the settings aren’t quite what I would recommend as defaults, but it’s very easy to make the changes.
First, choose Tools → AutoCorrect.
In the Word Completion tab, turn off word completion if it bugs you by unmarking the Enable Word Completion option. If you like it but want to change what key you use to accept the suggestion, you can do that too.
General Settings[edit]
A window you want to get to know: choose Tools > Options. I strongly recommend that you go through every option in that window since many are very useful. To get the options for text documents you need to have a Writer document open first; to get the options for spreadsheets you need a Calc document open first, and so on.
- I like to choose Tools → Options → OpenOffice.org → View. Select Large as the icon size.
- You might also want to turn on backups. Choose Tools → Options → Load/Save → General and select Always Create Backup Copy. The backups are created at the location specified for backups under Tools → Options → OpenOffice.org → Paths.
- If you find the colour selection in OpenOffice.org lacking, you can create your own under Tools → Options → OpenOffice.org → Colors.
Printing[edit]
Writer printing: Tools → Options → OpenOffice.org Writer, Print: you might want to turn off the option for printing automatically inserted blank pages unless you’re heavy into the first page of a new section starting on the right-hand page.
Calc printing: Tools → Options → OpenOffice.org Calc, Print: it’s best to turn off both options here. If you want to select two or more sheets to print when you’re ready to print, just select one sheet tab, then hold down Ctrl and click on each additional sheet you want to print.
Other Options[edit]
Regular Expressions in Calc Spreadsheets: Tools → Options → OpenOffice.org Calc → Calculate. Select the Enable Regular Expressions in Formulas option.
What the Enter Key Does in Calc: Tools → Options → OpenOffice.org Calc → General. From the list, select what action the Enter key does for the Press Enter to Move Selection option. If you want to go down to the next line and then back to column A as quickly as possible, select Down here. Then when using the spreadsheet, press Enter, then the Home key.
Language and Dictionaries[edit]
To specify a language for measurements, currency symbols, dates, etc., choose Tools → Options → Language Settings → Languages. Make the appropriate selections and click OK.
To install a different spelling dictionary, see the downloads and instructions here.
To tweak the configuration for spelling, choose Tools → Options → Language Settings → Writing Aids. The option to spell-check all caps words, for instance, is off, so you can turn that on if you want.
You can also create a new dictionary by clicking New, so that you can store your own words like names and speciality terms in it.
To add words to the new dictionary, select it and choose Edit.
File Format[edit]
I strongly recommend that you just save documents in the normal OpenOffice.org format: .odt for text, .ods for spreadsheets, and .odp for presentations. The issues aren’t too bad for spreadsheets and presentations, but with text files you lose some features including the names of custom page and list styles, and any background page formatting attributes.
Short-cuts[edit]
There are at least three things you can do to make working faster and more keyboard-oriented.
AutoCorrect[edit]
Choose Tools → AutoCorrect, Replace tab. For words and terms you type a lot like your name or full city name and logo, use this window. Type a non-word shortcut in the Replace field, then type what you actually want to appear in the With field. Click New, then click OK.
Then type the non-word shortcut you set up and press Space. The actual term you want will appear.
AutoText[edit]
This is for more advanced text, or text and graphics, with or without formatting. You might use this for boilerplate letterhead, a standard disclaimer, standard bits of a contract, etc. Select the content that you want, then choose Edit → AutoText.
Type a good descriptive name, then a shortcut; it must be unique so type three or more characters for best chances. Select a category; I recommend you create a new one by clicking Categories.
Then hold down the Autotext button and select New to create the autotext. Close the window.
To insert your AutoTexts in documents, type the shortcut, then press F3.
Keyboard Shortcuts[edit]
Choose Tools → Customize, Keyboard tab. Scroll through the categories at the bottom left, and select an item in the Function column. You’ll see in the Keys list whether there’s a shortcut for it. To change it, or to add one if there isn’t one, just select it in the Shortcut Keys list at the top and click Modify.
Extensions[edit]
The site http://extensions.openoffice.org/ has a huge number of add-on features that individuals and organizations have created. Look through them to see which ones you want; I like the little one that lets you upload files directly to your Google Docs account.
To install extensions, just download them from that site. Then choose Tools > Extension Manager, select My Extensions, and click Add. Find the downloaded extension file, and the window does the rest.
Labels and Envelopes[edit]
WorldLabel ready-to-use templates: If all you want to do is type some content and/or graphics into a prefab label template, then go to WorldLabel. They have templates, as well as some articles I’ve written on how to make’em a little fancier. http://www.worldlabel.com/Pages/openoffice-template.htm
Envelopes: Envelopes work a little differently. The address in your letter doesn’t automatically appear in your envelope document. Here’s what I recommend. Always print envelopes separately. Choose Insert → Envelope, type what you need in the field, and click New Document. For more information on envelopes, see my blog entries on envelopes at http://openoffice.blogs.com/openoffice/envelopes/index.html
Labels and envelopes from a data source: To do a mail merge for envelopes or labels, you need to just have your addresses in a spreadsheet (other sources are options too) but you need a simple little database file to run the communication between the label document and your spreadsheet full of address info. Here are some blog entries on that: http://openoffice.blogs.com/openoffice/2007/11/rough-draft-vid.html http://openoffice.blogs.com/openoffice/2007/12/how-to-turn-you.html
Fonts, Templates, and Clip Art[edit]
It’s nice to have some goodies around to help formatting quicker and more fun.
Fonts[edit]
If you find you don’t have all the fonts you used to in OpenOffice.org, it’s because the fonts were part of your other program. You can buy fonts, but of course it’s cheaper to find free ones. Just google for free fonts, and download the file for your operating system. Here’s one site: http://www.1001freefonts.com/
Just install them on your operating system; to do it on Windows, put the font file in your Windows\Fonts directory. Then the new fonts will show up in OpenOffice.org in the fonts list.
Templates[edit]
OpenOffice.org doesn’t come with many templates. But Microsoft Office does. I’m not 100% sure about all the licensing, but let’s say that your Microsoft Office license doesn’t forbid you to use those templates in other programs. Just convert them to OpenOffice.org format.
Choose File → Wizards → Document Converter. Select Microsoft Office and all three types of documents, just to be sure you’re covering everything.
[[Image:OpenOffice.org - documentconverter.jpeg|Document Converter Wizard==
Click Next, and fill in where the templates are, and where they’re going. Note: the converter doesn’t like directories with spaces for the Save To field.
Complete the wizard and the converted copies will be created.
Then choose Tools → Options → OpenOffice.org → Paths, select the Templates line, click Edit, and add the location of those converted copies.
Now when you choose File → New → Templates and Documents, that directory of the subdirectories inside it will appear. (In this case, there are the subdirectories Word, Excel, and PowerPoint located inside the C:\templates_converted directory.) Double-click the directory name, and select a template.
When you open the template, it’ll look pretty much like it did in Microsoft Office. One note: these gray fields are typically macro-based and don’t work in OpenOffice.org. But that’s fine, since you can just select the gray field, and type over it. Same effect.
- Note: With PowerPoint templates, Microsoft Office does an annoying thing that means you need to spend a few minutes on something. The title (not the file name) of every PowerPoint template is PowerPoint Presentation. The OpenOffice.org converter uses that title to name the converted OpenOffice.org Impress copies. Needless to say, non-unique names are a problem.
Here’s what you need to do: it’s simple, but tedious. Before converting, in your file manager, find the Powerpoint templates. For each one:
- Right-click on it and choose Properties.
- In the General tab, select the file name and copy it.
- Click the Details tab. You’ll see that the name is Powerpoint Presentation.
- Paste the file name into the Title field instead of Powerpoint Presentation.
- Click OK.
Now each template will have a unique name when you convert it.
Clip Art[edit]
OpenOffice.org doesn’t have much clip art. However, it’s really easy to add any clip art you have, and it’s easy to find and download free clip art.
First, think of any clip art you have access to already. Any directory on your computer that contains graphics could be useful.
Then download any paid or free clip art you want. Just google “free clip art†and you’re in up to your eyebrows.
- Note: There are some clip art extensions at http://extensions.openoffice.org/ You can add those just by installing the extension following the directions in this article in the Extensions section.
Now add it to the Gallery. You can view and hide the Gallery by choosing Tools → Gallery.
Click the New Theme button; theme is just another word for category. In the General tab, name the theme.
Click the Files tab. Click Find Files and specify the directory where your graphics are located.
Now, before leaving the window, be sure to click Add All (or select some of the files and click Add).
Then click OK. You’ll see your new category and the graphics. To put one in your document, just drag it in.
Take a Look at Other Free Software[edit]
It’s a big candy store out there. Photo editing and drawing, media, web software, chat, and a zillion other things. Here’s a good place to start: http://www.download.com/
If you’re used to the very cool features in PowerPoint, Impress is going to be a little less fun for you. Try these programs, which are more targeted at multimedia: http://www.pachyderm.org/ and http://powerbullet.com/
Learning the Features[edit]
To learn more about the features, you have several options:
The documentation at http://documentation.openoffice.org/
Many blogs, including http://openofficetips.com for great spreadsheet information, and my blog, http://openoffice.blogs.com
The OpenOffice.org user’s mailing list, and its archives. http://www.openoffice.org/mail_list.html#general Many books are available through Amazon, including my OpenOffice.org 2 Guidebook. For all ordering options, see http://openoffice.blogs.com/bookresources I also have detailed, step-by-step, illustrated learning materials at www.cafepress.com/getopenoffice
Three Mantras[edit]
- When in doubt, right-click.
- OpenOffice.org does what you tell it to do, but nothing else. It doesn’t try to guess what else you might want; this means more control but more responsibility.
- Much is possible; less is obvious. Always ask. Don’t just assume it’s not possible or doesn’t work. Start with users@openoffice.org archives, hit my blog and look in the categories, and of course google. For advanced macro and database questions, try http://oooforum.org.
References[edit]
This page is based upon Solveig Haugland's article under the terms of Creative Commons Attribution-Noncommercial 3.0 Unported licence


